
Running an online business without accurate website data is like driving down a highway with a dirty windshield. You know you are moving forward, but you have no clear idea where you are going or what obstacles are right in front of you.
When you build landing pages, sales funnels, or email collection forms, seeing raw visitor numbers is not enough. You need to know where those people come from, what buttons they click, how long they stay, and why some leave without buying.
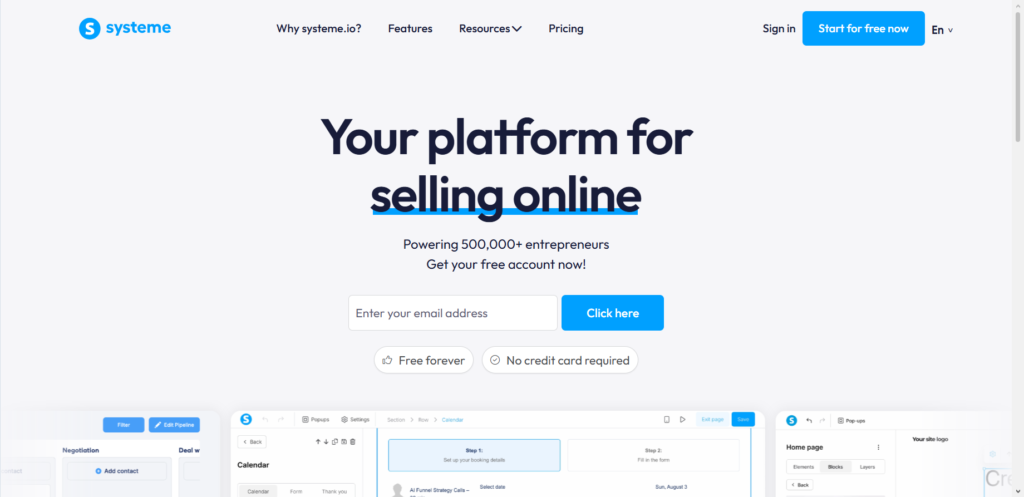
Systeme.io is an amazing all-in-one platform for creators, affiliate marketers, and small business owners. It lets you create sales funnels, host blog posts, send marketing emails, and sell online courses from one single dashboard.
While the platform gives you basic sales statistics, its built-in reporting tools do not tell the whole story. You cannot easily see deep demographic data, real-time traffic sources, or exact user navigation paths.
That is where Google Analytics comes into the picture. Integrating this free tool with your account gives you a complete, clear picture of your entire audience.
The $0 Secret To Launching Your Entire Online Empire
Why pay hundreds every month for separate software? Build funnels, send emails, and make sales with Systeme.io completely free.
Get Started For $0Free Forever • No Credit Card Needed • Beginner-Friendly
In this guide, you will learn the exact steps to connect Google Analytics 4 to your account. You will be able to track every single click, discover your top traffic sources, and optimize your funnels for higher sales.
Why You Need Google Analytics for Your Funnels
Many online entrepreneurs rely solely on basic metrics like total page views or raw lead counts. These numbers give you a quick glimpse of performance, but they miss critical underlying details.
Google Analytics 4 gives you detailed reports on user behavior that basic platform tools simply cannot match. It shows you the exact path visitors take before making a purchase or filling out a form.
Here are a few major reasons why connecting these two platforms is essential for your online business growth.
Track Traffic Sources with Precision
Knowing how many people visit your page is helpful, but knowing where they came from changes everything.
Google Analytics breaks down your incoming traffic by source. You can see whether visitors arrived from organic Google searches, Facebook posts, YouTube descriptions, email newsletters, or paid advertisements.
When you know which platform brings in the most engaged visitors, you stop guessing where to focus your marketing energy. You can double down on channels that bring real results and stop wasting effort on platforms that bring zero sales.
Understand Visitor Behavior and Drop-Off Points
Have you ever noticed hundreds of people visiting your landing page, but almost nobody signing up?
Without deep analytics, you are left making wild guesses about why people leave. Did they lose interest at the headline? Was the page loading too slowly on mobile devices? Did they leave before reaching the checkout button?
Google Analytics highlights exact drop-off points along your funnel path. It reveals how long visitors spend on specific sections and when they decide to close the browser tab.
Discover Demographic and Device Insights
Your target audience might not be who you originally thought they were.
Google Analytics reveals crucial demographic data, including the geographic location, language, and device types of your site visitors.
If eighty percent of your traffic comes from mobile phones, but your sales funnel looks messy on small screens, you are losing money every single day. Seeing device breakdown reports allows you to test and fix mobile layout issues quickly.
What You Need Before You Get Started
Setting up tracking sounds complicated if you are not a technical expert, but the process is actually very straightforward. You do not need to write custom computer code or hire an expensive web developer.
Before following the step-by-step instructions below, make sure you have a few simple things ready.
Send, Spend & Hold Money Worldwide Without Hidden Fees
Transfer money internationally at the real exchange rate and hold 40+ currencies in one account.
Open a Wise AccountMid-market rate • Fast transfers • 40+ currencies
First, you need an active account on Systeme.io. You can use any plan, including the free plan, because header code tracking features are available across all tiers.
Second, you need a free Google account. This can be your regular Gmail address or a custom Google Workspace email associated with your business domain name.
Third, you need a few spare minutes to copy and paste code snippet text between your browser tabs.
Once you have these items ready, you are fully prepared to begin the setup process.
Step 1: Set Up Your Google Analytics 4 Property
Google replaced its old tracking system with Google Analytics 4, often called GA4. If you created a tracking account years ago, you must ensure you are using a new GA4 property, which relies on a Measurement ID starting with the letter G.
Follow these simple steps to set up your property and grab your installation code snippet.
Create Your GA4 Account and Property
- Open a new browser tab and navigate to Google Analytics.
- Log in using your Google account credentials.
- Click the gear icon labeled Admin in the bottom-left corner of the screen.
- Click the blue button labeled Create Account or Create Property.
- Enter a clear name for your business property, such as your website title or brand name.
- Select your primary time zone and preferred currency, then click Next.
- Fill out the quick industry assessment questions and click Create to accept the terms of service.
Set Up a Web Data Stream
- Once your new property opens, you will be prompted to choose a platform to start collecting data.
- Choose Web as your platform choice.
- Enter your main custom domain or default web link in the Website URL box.
- Enter a simple Stream Name, such as Main Website Stream.
- Click Create Stream to generate your tracking details.
Locate and Copy the Google Tag Code
- After creating your web stream, a details window will appear showing your Measurement ID.
- Scroll down to the bottom section labeled View Tag Instructions or Install Manually.
- Click on the Install Manually tab.
- You will see a box containing several lines of JavaScript code that begins with the phrase global site tag.
- Click the copy icon in the upper right corner of the code block to copy the full JavaScript snippet to your clipboard.
Keep this tab open or save the copied text in a temporary text file so you do not lose it.
Step 2: Add Google Analytics to Your Entire Systeme Account
The fastest and most efficient way to track visitors is by adding your Google Analytics snippet to your global account settings.
When you use global tracking, every single funnel page, blog post, and opt-in page created inside your account automatically gets tracked. You do not have to copy and paste code over and over every time you build a new funnel page.
Here is how to set up account-wide global tracking.
The $0 Secret To Launching Your Entire Online Empire
Why pay hundreds every month for separate software? Build funnels, send emails, and make sales with Systeme.io completely free.
Get Started For $0Free Forever • No Credit Card Needed • Beginner-Friendly
Navigate to Global Funnel Settings
- Log in to your main account dashboard.
- Look at the top right corner of your screen and click on your profile avatar icon.
- Click Settings from the dropdown list.
- On the left sidebar menu, scroll down and click on Funnel Settings.
Paste the Tracking Snippet into the Header Box
- Inside the Funnel Settings panel, look for the field labeled Tracking Code or Edit Header Code.
- Click inside the text box labeled Header Code.
- Paste the entire JavaScript code snippet you copied earlier from Google Analytics.
- Make sure you do not delete any characters or add random spaces inside the snippet text.
- Scroll down to the bottom of the page and click the green Save button.
Once saved, the tracking script automatically loads in the background whenever a visitor opens any page across your entire account.
Step 3: Add Google Analytics to a Specific Sales Funnel
Sometimes you might not want global tracking across your entire site. For example, you might manage multiple client funnels inside one account, or you might want to run isolated analytics for a specific promotional launch.
You can paste your tracking snippet directly into an individual funnel instead of using global account settings.
Follow these steps for single-funnel tracking.
Open Your Specific Funnel
- From your main dashboard, click on the Funnel tab in the top navigation bar.
- Find the specific funnel you want to track from your list and click its title to open it.
Access Funnel-Level Settings
- Look near the top menu of your funnel workspace and click the Settings tab.
- Scroll down until you locate the Tracking Code or Header Code section for that specific funnel.
- Paste your Google Analytics code directly into the header tracking code box.
- Click Save Changes at the bottom of the page.
Now, only pages built inside this particular funnel will report visitor data back to your property.
Step 4: Add Code to Individual Pages or Custom Blog Layouts
If you prefer maximum control over individual landing pages or custom blog posts, you can place code manually inside individual page editors.
This option is helpful if you want to test different tracking scripts across unique landing pages or track custom subdomains separately.
Add Code inside the Page Editor
- Go to your Funnels list and select your target page.
- Click the Edit Page button represented by a magic wand icon to open the visual builder.
- Click Settings in the top-left panel of the page editor interface.
- Scroll down the left sidebar until you find the section named Edit Header Code.
- Click the button to open the popup code window.
- Paste your Google Analytics script into the box.
- Click Save, then save your changes on the main builder panel before exiting.
Step 5: Verify That Your Tracking Code Works Properly
Never assume that copied code works without testing it yourself. Small mistakes, like missing a single bracket or failing to click save, can prevent data collection.
Fortunately, verifying your connection takes less than sixty seconds using live reporting tools.
Test Your Connection Using Realtime Reports
- Open your Google Analytics dashboard in your web browser.
- In the left navigation menu, click Reports, then select Realtime.
- Open a brand new private or incognito window in your browser.
- Visit your published landing page or funnel link in that new private window.
- Spend a few seconds clicking around or scrolling down the page.
- Return to your Google Analytics tab and look at the Realtime map display.
If your setup was successful, you will see a blue dot appear on the world map along with a active user count of 1 or more.
If you do not see active traffic right away, do not panic. Disable any browser ad blockers you are running, reload your live funnel link, and check the dashboard again after one or two minutes.
Common Tracking Mistakes to Avoid
Even though setting up tracking is simple, a few small errors can mess up your reporting data. Keeping these potential issues in mind will save you time and head-to-toe troubleshooting stress.
Double-Pasting Code Snippets
One of the most frequent mistakes creators make is pasting tracking scripts in two places at once.
If you add your Google Tag inside Global Settings, and then paste the exact same snippet into an individual funnel page header, Google will register every page view twice.
This inflates your page view numbers falsely and cuts your reported bounce rate in half. Stick to one method: either use global account tracking for everything or page-level tracking for specific projects.
Pasting Code into the Footer Instead of Header
Google Analytics scripts are designed to load as fast as possible so they capture visitors who leave quickly.
If you accidentally paste your script into the Footer box instead of the Header box, the tracking script will load last. If a user leaves your page before the entire footer finishes loading, their visit will never be recorded.
Always double-check that your script is pasted into the box explicitly labeled Header Code.
Forgetting to Save Your Changes
It sounds simple, but many people paste their snippet into the code box and immediately close the browser tab. Always remember to click the green Save button at the bottom of the page or workspace menu before leaving.
How to Get Better Traffic Insights for Your Business
Now that your tracking system is up and running smoothly, you can begin analyzing visitor data to make smarter business choices.
Instead of staring at basic page view numbers, pay close attention to user acquisition reports. Look closely at where your highest-converting traffic comes from.
For example, if you notice that traffic from YouTube converts at ten percent while traffic from X converts at less than one percent, you immediately know where to allocate your marketing resources.
You can also create custom event tracking inside GA4 to measure button clicks, form submissions, video play time, and checkout completions.
Taking a data-backed approach to digital marketing eliminates second-guessing and helps you scale your online business predictably.
Frequently Asked Questions
How long does it take for Google Analytics to show visitor data?
Real-time user traffic appears in your reports instantly within seconds of someone loading your page. However, full historical reports, demographic breakdowns, and acquisition summaries take up to 24 to 48 hours to fully populate inside your account dashboard.
Is Google Analytics completely free to use with my funnels?
Yes, Google Analytics 4 is entirely free for standard websites and business funnels. You do not need to upgrade to paid premium tiers to track visitor behavior, traffic channels, or page performance metrics.
Will adding this tracking code slow down my page loading speeds?
Google Analytics uses asynchronous loading scripts, meaning the tracking code loads in the background without delaying the display of your text, images, or sales videos. Your page speed remains fast and responsive for mobile and desktop visitors alike.
What is the difference between Measurement ID and Header Tracking Code?
A Measurement ID is a unique string starting with G that identifies your web stream. The Header Tracking Code is the complete JavaScript block containing that Measurement ID. To connect your account without extra plugins, you must copy and paste the entire JavaScript block into your header code section.
Can I track actual sales and product purchases inside GA4?
Yes, you can track sales and order completions by placing custom event snippets or thank-you page tracking scripts on your purchase confirmation pages. When a customer reaches the final thank-you page after paying, GA4 registers a completed purchase event.
Connecting Google Analytics to your sales funnels is one of the most effective steps you can take to understand your audience and scale your business earnings.
Instead of guessing what works, you gain clear, actionable data showing exactly how visitors interact with your pages. Take five minutes today to set up your tracking snippet, verify your real-time connection, and start making confident, data-driven decisions.
For more helpful guides on building your online presence, read our About Page to see what we are working on next, or reach out directly through our Contact Page if you have any questions. You can also follow our community updates across social media on Instagram, Facebook, and X.
For a visual step-by-step walkthrough of this integration process, check out this video: How To Connect Google Analytics To Systeme.io Step-by-Step Tutorial.
