

You’ve built your email list. You’ve written your first newsletter. You hit send… and nothing happens. Or worse, your email lands straight in the spam folder.
I’ve seen this happen more times than I can count. And in nearly every case, the culprit was the same: an unverified domain.
Here’s the thing. Email providers like Gmail, Yahoo, and Outlook have become incredibly strict. If they can’t verify that your email actually comes from you, they will reject it or mark it as spam. This isn’t a glitch. It’s a security measure designed to protect people from phishing and fake senders.
The good news? Fixing this is simpler than you think. In this guide, I’ll walk you through exactly how to verify your domain on Systeme.io. No technical background needed. Just follow along step by step, and your emails will start landing where they belong—in the inbox.
What Is Domain Verification and Why Does It Matter?
Domain verification is the process of proving you own the domain name you’re sending emails from. Think of it like showing ID at an airport. Email providers want to see your credentials before letting you through.
When you verify your domain, you’re telling Gmail, Yahoo, and other providers, “I’m the real owner of this domain, and Systeme.io has my permission to send emails on my behalf.” Without this verification, your emails look suspicious by default.
Here’s what happens when you skip this step. Your emails get flagged as unauthenticated. They go straight to spam or get blocked entirely. Your open rates drop. Your subscribers never see your message. And your business suffers.
I learned this lesson the hard way early in my journey. I spent hours crafting a perfect email sequence, hit send, and watched in horror as my delivery rate plummeted to nearly zero. The problem wasn’t my content. It was my domain. I hadn’t verified it. Once I fixed that, everything changed. My emails started reaching inboxes. My open rates doubled. And I stopped wasting time on messages nobody ever saw.
Systeme.io makes domain verification mandatory for sending emails. So this isn’t optional. But the process takes less than ten minutes, and the benefits are enormous.
What You Need Before You Start
Before we dive into the steps, make sure you have these two things ready:
- A Systeme.io account. You’re probably already using this. If not, sign up first.
- A custom domain name. This means a domain you own, like . You cannot authenticate domains from free email providers like Gmail, Yahoo, or ProtonMail.
- Access to your domain’s DNS settings. This is where you’ll add the verification records. Your domain registrar (like GoDaddy, Namecheap, or Cloudflare) controls this.
One important note. Your domain must lead to an active website. If your domain shows a 404 error page or goes nowhere, email providers may still block your emails even after verification. So make sure your site is live before proceeding.
Step-by-Step Guide to Verify Your Domain on Systeme.io
Let’s walk through this together. The entire process takes about ten minutes, though you’ll need to wait up to 48 hours for the changes to fully take effect.
1. Access Your Domain Settings in Systeme.io
First, log into your Systeme.io account. Hover over your profile picture in the top right corner and click Settings from the dropdown menu.
In the Settings menu, click on Emails. Then scroll down to the Domains section. You’ll see a link labeled, “Click here to authenticate your domain and display its information in your email header, which will help improve your email delivery rates”. Click that link.
A popup window will appear. Enter your domain name without the “www” —for example, “yourbusiness.com” instead of “www.yourbusiness.com”. Click Save.
Systeme.io will now generate several records for you. You’ll see a table with three CNAME records and one DMARC record. Keep this window open. You’ll need these records for the next step.
2. Add the Records to Your Domain’s DNS Settings
Now you need to log into your domain registrar or hosting provider. This is where you manage your domain’s DNS settings. Common providers include GoDaddy, Namecheap, Cloudflare, Bluehost, and many others.
Once logged in, navigate to your domain’s DNS management area. Look for a section labeled “DNS Records,” “Zone Editor,” or something similar.
Here’s what you need to add:
Three CNAME records. For each of the three CNAME records Systeme.io provided, create a new DNS record. Select CNAME as the record type. In the Name or Host field, paste the value from Systeme.io.
Important: only enter the part before your domain name.
For example, if Systeme.io shows “si942517.yourdomain.com,” enter only “si942517”.
In the Value or Points To field, paste the full target address provided by Systeme.io.
Add a period at the end, like “inbound.systeme.io.”
One TXT record for DMARC. Create another new record. This time select TXT as the record type. In the Name or Host field, enter “_dmarc”. In the Value field, paste the DMARC record exactly as Systeme.io provided it. It will look something like “v=DMARC1; p=none; rua=mailto:youremail@yourdomain.com”
Save each record after adding it. Double-check that you’ve added all four records correctly. A single typo can break the entire verification process.
3. Wait for DNS Propagation
This is the part where patience matters. DNS changes don’t happen instantly. They need time to spread across the internet. This process is called propagation, and it can take anywhere from a few minutes to 48 hours.
During this time, Systeme.io will show your domain as pending verification. Don’t panic. This is normal. Just wait.
You can check the status of your records using a free tool like DNS Checker. Paste the hostnames from your CNAME records into the search field, select the CNAME option, and run the search. The tool will show you whether the records have propagated to different locations around the world. Once they show up consistently, you’re ready for the final step.
4. Confirm Verification in Systeme.io
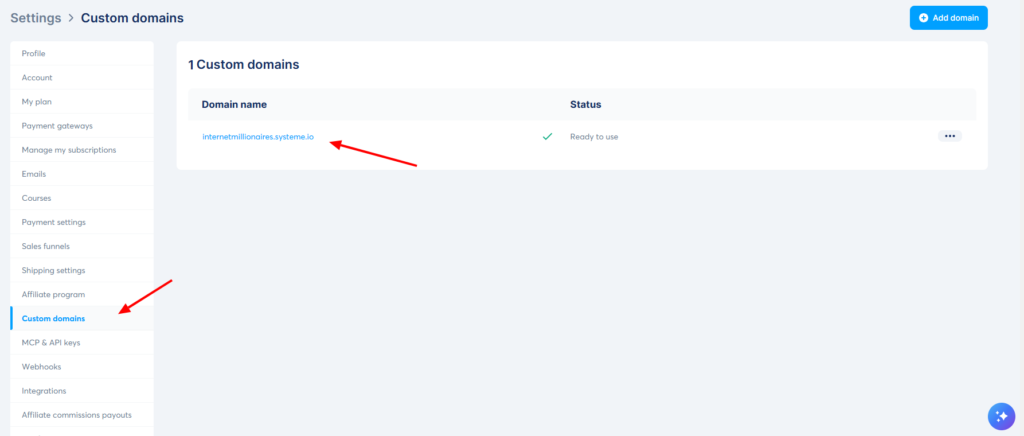
After propagation is complete, return to Systeme.io. Go back to Settings > Emails > Domains. Your domain should now show as verified or approved.
If it still says pending, wait a bit longer. If more than 48 hours have passed and nothing has changed, something may be wrong. Check your DNS records again for typos. Make sure you added all four records correctly. And confirm that your domain points to an active website, not an error page.
Once verified, you’re done. Your domain is now authenticated. Every email you send from Systeme.io using this domain will carry the proper credentials that email providers trust.
Understanding the Technical Side (Made Simple)
You don’t need to be a tech expert to verify your domain. But understanding what you’re actually doing helps you avoid mistakes and troubleshoot problems.
When you verify your domain, you’re setting up three security protocols: SPF, DKIM, and DMARC. Systeme.io handles most of this automatically when you add the records they provide. Here’s what each one does.
SPF (Sender Policy Framework) is like a guest list for your domain. It tells email providers, “These specific servers are allowed to send emails from my domain.” If an email comes from somewhere not on the list, it gets flagged.
DKIM (DomainKeys Identified Mail) adds a digital signature to every email you send. Think of it as a wax seal on an old letter. It proves the email hasn’t been tampered with during delivery and genuinely came from you.
DMARC (Domain-based Message Authentication, Reporting & Conformance) ties everything together. It tells email providers what to do if an email fails the SPF or DKIM checks—whether to deliver it anyway, mark it as spam, or reject it completely.
Together, these three protocols tell Gmail, Yahoo, and every other email service, “This email is legitimate. Let it through.”
Common Problems and How to Fix Them
Even when you follow the steps correctly, things can go wrong. Here are the most common issues I’ve seen and how to fix them.
Your domain remains pending for more than 48 hours.
This almost always means something is wrong with your DNS records. Double-check each CNAME and TXT record. Look for typos in the host names or target values. Make sure you didn’t accidentally add an extra space or missing period. Also confirm that your domain points to a working website, not a 404 page.
Your emails still go to spam after verification.
Domain verification isn’t a magic fix for everything. If your emails still land in spam, check your email content. Avoid spammy words like “free,” “guarantee,” or “earn money” in your subject lines.
Make sure you’re sending to people who actually want your emails. And warm up your sending reputation by starting with small campaigns before scaling up.
You added the records but can’t find them in your DNS.
Some domain registrars hide advanced DNS settings. Look for terms like “Advanced Settings,” “Zone Editor,” or “DNS Management.” If you still can’t find it, contact your provider’s support team. They deal with this every day and can point you in the right direction.
Systeme.io says your domain is invalid.
Make sure you entered your domain name without the “www” during setup. Also confirm that your domain is active and not expired. A domain that has lapsed cannot be verified.
Best Practices After Verification
Once your domain is verified, your work isn’t completely finished. Here are a few best practices to keep your email deliverability high.
Use a professional sender name.
Don’t send emails from “noreply@yourdomain.com” if you can avoid it. People trust real names. Use something like “hello@yourdomain.com” or “support@yourdomain.com” to build credibility.
Warm up your email sending gradually.
If you’re sending from a brand new domain, don’t blast 10,000 emails on day one. Start small. Send to your most engaged subscribers first. Gradually increase volume over several weeks. This tells email providers you’re a legitimate sender, not a spammer.
Monitor your delivery rates.
Systeme.io provides basic analytics on email opens and clicks. Pay attention to sudden drops. If your open rates fall off a cliff, something may have changed with your domain authentication.
Keep your DNS records intact.
Once you’ve added the verification records, don’t remove them. If you switch domain registrars or hosting providers, make sure the records transfer over. Losing these records means losing your verification.
Frequently Asked Questions
Do I have to verify my domain if I only use Systeme.io for landing pages?
Yes, if you plan to send any emails from Systeme.io—even a single broadcast—you must verify your domain. Authentication is mandatory for email sending.
Can I verify multiple domains in one Systeme.io account?
Systeme.io allows you to verify multiple custom domains. The process is the same for each one. Just repeat the steps above for each domain you want to use for sending emails.
What if I use a subdomain instead of a root domain?
You can verify subdomains as well. The process is nearly identical. Just enter your full subdomain (like “news.yourbusiness.com”) during setup instead of the root domain.
How long does verification take after I add the DNS records?
Most domains verify within a few hours. But DNS propagation can take up to 48 hours in some cases. If your domain isn’t verified after two days, double-check your records for errors.
Do I need to verify my domain for each email service I use?
Yes. If you use multiple email marketing platforms (like Systeme.io and ConvertKit), you’ll need to verify your domain separately on each one. The records may differ between platforms.
Final Thoughts
Verifying your domain on Systeme.io isn’t glamorous work. But it’s one of the most important things you can do for your email marketing. A verified domain means your messages actually reach people.
It means your hard work writing emails doesn’t go to waste. And it means your subscribers see what you send instead of marking you as spam.
I’ve helped dozens of entrepreneurs fix their email deliverability issues. And in almost every case, the solution was this simple process. No complicated code. No expensive tools. Just ten minutes of focused work and a bit of patience.
So take fifteen minutes right now. Log into Systeme.io. Add those DNS records. And give your emails the fighting chance they deserve.
What has been your biggest struggle with email deliverability so far? Drop a comment below and let me know. I read every one.