
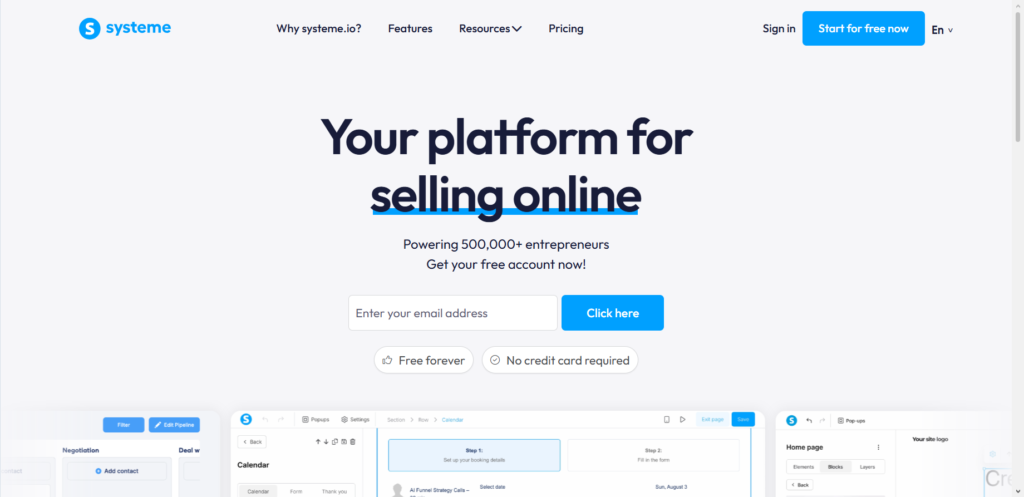
Your web address is often the very first thing a potential customer notices when clicking on your link. If your website link looks like yourbrand.systeme.io, it can make your online business look temporary or amateurish. People hesitate to enter their credit card details or email addresses on web pages that do not look 100% official.
Changing your domain name on Systeme.io from the default address to a custom web address is one of the smartest upgrades you can make. A custom URL like [www.yourbrand.com](https://www.yourbrand.com) builds instant credibility, improves your brand recognition, and helps your marketing emails avoid the spam folder.
If you are looking to connect a brand new custom domain or update existing sales funnels to use a new domain name, this guide walks you through every single step in basic English. You do not need any coding knowledge or technical experience to get this done today.
Why Having a Custom Domain Name Matters for Your Business
Using a generic subdomain might work when you are just testing out ideas, but running a real online business requires a professional setup. Here is why making the switch to a custom URL is essential.
1. Instant Trust and Credibility
Visitors judge your business within seconds of landing on your page. A custom domain tells your audience that you are serious, legitimate, and invested in your brand. People are much more comfortable buying courses, digital products, or services from a site with a real domain name.
The $0 Secret To Launching Your Entire Online Empire
Why pay hundreds every month for separate software? Build funnels, send emails, and make sales with Systeme.io completely free.
Get Started For $0Free Forever • No Credit Card Needed • Beginner-Friendly
2. Stronger Brand Recognition
Your brand name is your identity online. When your link includes systeme.io, you are essentially promoting another platform alongside your own. A short, memorable custom URL makes it easy for clients to remember your website and return directly later.
3. Better Email Delivery Rates
If you send email newsletters or automated sales sequences through Systeme.io, using a custom domain name connected to your account keeps your messages out of spam boxes. Major inbox providers like Gmail and Yahoo look closely at domain authentication before delivering marketing emails.
What You Need Before Starting
Before diving into the settings, make sure you have a few simple things ready:
- An active Systeme.io account.
- A domain name purchased from a domain registrar like Namecheap, GoDaddy, Hostinger, or Cloudflare.
- Login credentials for your domain registrar account so you can edit DNS settings.
If you have not bought a domain name yet, you can buy one for just a few dollars per year from any reputable host. Once you have your domain name ready, you are set to connect it.
Step 1: Add Your Custom Domain Inside Systeme.io
The first step takes place inside your Systeme.io dashboard. You need to tell the platform which custom domain you want to use so it can generate unique connection codes for your account.
- Log in to your Systeme.io account.
- Click on your profile picture in the top right corner of the dashboard.
- Select Settings from the drop-down menu.
- Look at the left sidebar menu and click on Custom Domains.
- Click the green Add domain button located near the top of the page.
A pop-up box will appear asking for your domain name. It is very important to type your domain name starting with www (for example, [www.yourbrand.com](https://www.yourbrand.com)) rather than just yourbrand.com. Systeme.io requires the www prefix or a specific subdomain to function properly with its server system.
Once you enter your domain and click Save, a new pop-up window will display two lines of security codes known as CNAME records. Keep this window open or copy these two rows into a temporary text file, because you will need them for the next step.
Step 2: Add CNAME Records in Your Domain Registrar
CNAME records act like digital signposts. They tell the internet that whenever someone types your custom domain into a web browser, traffic should be pointed directly to your website pages hosted on Systeme.io.
Every domain seller has a slightly different layout, but the core process is identical across all platforms.
How CNAME Records Work
Systeme.io gives you two CNAME records:
- First CNAME Record: Connects your
wwwweb address to Systeme.io’s server network (usually pointing to a CloudFront address). - Second CNAME Record: Verifies that you are the real owner of the domain so Systeme.io can issue a free SSL security certificate (the secure padlock icon in web browsers).
Adding CNAMEs on Popular Hosts
On Namecheap:
- Log in to your Namecheap account and go to your Domain List.
- Click Manage next to your domain name.
- Click on the Advanced DNS tab at the top.
- Click Add New Record.
- Select CNAME Record as the type.
- For Host, enter
www. For Target, paste the first value provided by Systeme.io. - Create a second CNAME record. Copy the long code string before your domain name from Systeme.io for the Host field, and paste the corresponding target value into the Target field.
- Save both records.
On GoDaddy:
- Log in to GoDaddy and navigate to My Products.
- Find your domain and click DNS or Manage DNS.
- Click Add New Record and select CNAME from the dropdown.
- Input
wwwin the Name box and paste the first target value from Systeme.io in the Value box. - Add the second CNAME record using the validation name and value provided in your Systeme.io pop-up window.
- Click Save.
On Hostinger:
- Log into Hostinger and go to Domains.
- Select your domain and click DNS / Nameservers on the side menu.
- Choose CNAME under record type.
- Enter
wwwin Name and the CloudFront URL in Target. - Enter the security code in Name for the second record and its target URL in Target.
- Click Add Record.
Step 3: Set Up Domain Redirection (Naked Domain to WWW)
Many visitors will type yourbrand.com directly into their address bar without adding www at the start. Since you connected [www.yourbrand.com](https://www.yourbrand.com) to Systeme.io, typing the address without www might lead to an error page unless you set up domain forwarding.
Setting up redirection ensures that anyone visiting yourbrand.com is instantly redirected to [www.yourbrand.com](https://www.yourbrand.com) without any issues.
- Return to your domain registrar’s control panel (Namecheap, GoDaddy, Hostinger, etc.).
- Locate the section labeled Domain Forwarding, Redirection, or Redirects.
- Click Add Redirection or Forward Domain.
- Set the source domain as
yourbrand.com(without www). - Set the destination URL as
[https://www.yourbrand.com](https://www.yourbrand.com). - Choose Permanent Redirect (301) and save changes.
If you are using Cloudflare or Hostinger, you can also use an ALIAS record or CNAME flattening directly from the root domain pointing to your target CloudFront link instead of traditional web forwarding.
Step 4: Verify Your Domain Connection and DNS Propagation
After adding your CNAME records and setting up redirection, your new custom domain needs time to connect across the global internet. This process is known as DNS propagation.
Checking Domain Status in Systeme.io
Go back to your Custom Domains tab in Systeme.io. You will see your domain listed with a status tag:
Send, Spend & Hold Money Worldwide Without Hidden Fees
Transfer money internationally at the real exchange rate and hold 40+ currencies in one account.
Open a Wise AccountMid-market rate • Fast transfers • 40+ currencies
- Pending Validation: The servers are still communicating and verifying your setup. This is normal and usually takes anywhere from 15 minutes to a few hours.
- Ready to Use: Your domain is fully verified, secured with an SSL certificate, and ready to go live!
You can check if your records have updated globally by entering your domain name on DNSChecker.org. Select CNAME from the dropdown menu to see if green checkmarks appear worldwide.
Common Troubleshooting Tips
If your domain stays stuck on “Pending Validation” for more than 24 hours, review these common mistakes:
- Trailing Dots: Some domain registrars automatically append a dot at the end of CNAME values. Make sure there are no extra dots at the end of your target links if your provider rejects them.
- Duplicate A Records: Ensure you do not have old website hosting A Records active in your DNS settings that conflict with your new CNAME setup.
- Missing WWW: Double-check that you entered
wwwwhen adding the domain inside Systeme.io.
Step 5: How to Change the Domain Name on Existing Sales Funnels
Once your domain status displays Ready to use, you need to update your sales funnels so they load on your new custom URL instead of the default subdomain.
Connecting a domain to your account does not automatically update old funnels—you must assign the new domain to each funnel manually.
Here is how to change the domain name on any existing funnel:
- Log into your Systeme.io dashboard.
- Click on Sales Funnels in the top navigation bar.
- Click on the title of the funnel you wish to update.
- Click the Funnel settings button located near the top right side of the screen.
- Locate the field labeled Funnel domain.
- Click the drop-down menu and select your new custom domain (e.g.,
[www.yourbrand.com](https://www.yourbrand.com)). - Click Save at the bottom.
As soon as you save, every step inside that sales funnel instantly switches to your custom domain name. Your old default links will automatically route visitors to the new custom web address without breaking your traffic.
Step 6: Updating Your Blog, Home Page, and Email Settings
To get full value out of your new custom domain name, update your default account home page, blog settings, and email sender configurations across Systeme.io.
Setting Your Homepage
You can choose which funnel step or page visitors see when they type your main domain name into their browser.
- Navigate to Settings > Custom Domains.
- Find your connected domain and click the three horizontal dots on the right side.
- Click Settings or Home page setup.
- Choose the specific sales funnel page or blog page you want to use as your official home page.
- Click Save.
Changing Domain Name on Blogs
If you built a blog using Systeme.io’s built-in blogging engine, you can update its URL in seconds:
- Click on Blogs in your top menu.
- Click on your blog name.
- Open Blog settings.
- Change the domain dropdown menu to your new custom URL.
- Save your changes.
How to Switch From an Old Custom Domain to a Brand New One
If your business recently underwent a name change or rebrand, you might need to replace an existing custom domain with a brand new one.
The $0 Secret To Launching Your Entire Online Empire
Why pay hundreds every month for separate software? Build funnels, send emails, and make sales with Systeme.io completely free.
Get Started For $0Free Forever • No Credit Card Needed • Beginner-Friendly
The process is very straightforward:
- Add your new custom domain to Systeme.io following Step 1 and Step 2 above.
- Wait for the new domain status to change to Ready to use.
- Go into your Sales Funnels and Blogs settings, and switch the domain dropdown from your old custom domain to your new custom domain.
- Go back to Settings > Custom Domains.
- Click the three dots next to your old custom domain and select Delete if you no longer plan to use it.
If you want to preserve traffic from people clicking old links on social media, keep the old domain active in your domain registrar and set up a 301 redirect pointing the old domain to your new address.
Frequently Asked Questions (FAQs)
How long does it take for a custom domain to start working on Systeme.io?
DNS updates can take anywhere from 15 minutes up to 48 hours to complete worldwide. In most cases, if CNAME records are added correctly, your domain will show as “Ready to use” within 1 to 2 hours.
Can I use a domain without typing www?
Systeme.io requires a subdomain prefix like www or courses to connect properly with its server system. However, by setting up simple domain forwarding from yourbrand.com to [www.yourbrand.com](https://www.yourbrand.com) at your domain registrar, anyone typing the URL without www lands on your site instantly.
Is it possible to connect a subdomain like courses.yourbrand.com?
Yes! You can connect subdomains easily. Simply type courses.yourbrand.com when adding your domain in Systeme.io. In your registrar’s DNS settings, enter courses in the Name field instead of www.
What happens to my old funnel links when I change the domain name?
When you update a funnel’s domain inside Systeme.io, the platform updates all step paths automatically. Existing visitors using older URLs are smoothly redirected to the updated path without seeing error pages.
Does Systeme.io offer free DNS connection assistance?
Yes! If configuring DNS settings feels overwhelming, Systeme.io offers free domain connection support. You can contact their customer support team, provide limited temporary access to your domain provider, and their technical team will configure your CNAME records for free.
Does changing my domain name cost extra money on Systeme.io?
No. Connecting custom domains is completely free across all Systeme.io plans, including the Free Forever plan. You only pay the annual registration fee for your domain name to your domain registrar (Namecheap, GoDaddy, Hostinger, etc.).
Conclusion
Upgrading your web address from a generic subdomain to a custom URL is one of the quickest ways to polish your online business image. It instills confidence in your site visitors, makes your brand easy to remember, and enhances overall marketing conversions across sales funnels and email campaigns.
Take a few minutes today to log into your domain manager and Systeme.io dashboard, add your CNAME records, and give your brand the professional online home it deserves
