
Selling products or services online can feel overwhelming when you try to connect five different software tools. You need one tool for your website, another for email marketing, a third for hosting videos, and a fourth to accept credit card payments. The monthly costs add up quickly, and setting everything up can feel like solving a complex puzzle.
A sales funnel solves this exact problem. Instead of forcing visitors to navigate a confusing website with endless options, a sales funnel gives them a simple, clear path to follow. It takes a stranger, introduces them to your business, collects their contact information, and turns them into a paying customer.
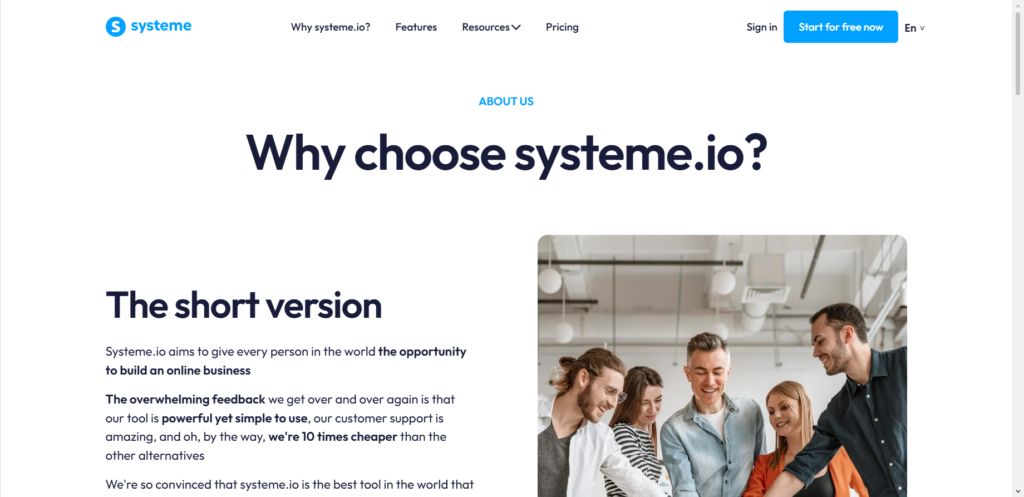
Systeme.io has become one of the most popular platforms for building sales funnels because it puts all these tools under one roof. You do not need to hire a developer or learn complicated coding. In this practical guide, you will learn step by step how to build, test, and launch a complete sales funnel using Systeme.io.
What Exactly is a Sales Funnel and Why Do You Need One?
A standard website is like a digital brochure. It has a home page, an about page, a blog, and contact links. When visitors arrive on a normal website, they click around, get distracted, and often leave without taking any real action.
A sales funnel is completely different. It is a series of dedicated web pages designed with a single goal in mind: guiding the reader toward one specific decision. Every page in the sequence has a clear purpose, eliminating extra links and distractions so the visitor stays focused on your message.
The $0 Secret To Launching Your Entire Online Empire
Why pay hundreds every month for separate software? Build funnels, send emails, and make sales with Systeme.io completely free.
Get Started For $0Free Forever • No Credit Card Needed • Beginner-Friendly
The Basic Anatomy of a Simple Sales Funnel
Most effective sales funnels follow four primary steps:
- The Squeeze Page (Opt-In Page): This page offers something helpful for free, like an ebook, a checklist, or a short video lesson. In exchange, the visitor enters their email address.
- The Sales Page: After signing up, the visitor is introduced to your core offer. This page explains how your paid product or service solves their specific problem.
- The Checkout Page: A simple, secure form where the customer enters their payment details and completes the purchase.
- The Thank You Page: A confirmation page that confirms the purchase, provides receipt details, and explains how to access the offer.
When these pages are linked together with automated emails working behind the scenes, you have a system that can generate leads and sales automatically day and night.
Why Systeme.io is Great for Beginners and Growing Businesses
Many marketing platforms charge heavy monthly subscription fees before you even earn your first dollar online. For anyone starting out on a budget, high subscription fees create unnecessary pressure.
Systeme.io stands out because it offers a very generous free tier. The free account gives you access to built-in email marketing, unlimited email sends, up to three full sales funnels, and space for up to 2,000 email subscribers.
Instead of juggling different logins and paying separate fees for page builders, email service providers, and course hosting platforms, Systeme.io handles everything inside one clean dashboard.
If you like discovering smart online tools and tech solutions that save time and money, take a look at our technology and AI category for more modern guides and software reviews.
Step 1: Register and Set Up Your Systeme.io Account
Setting up your workspace is quick and straightforward. Head over to the official Systeme.io website and type in your email address to create a free account. After clicking the confirmation link sent to your inbox, you will land directly inside your main control panel.
Before building your first funnel page, configure a few basic settings so your account is ready to handle payments and send emails smoothly.
Connecting Payment Processors
If you intend to sell digital goods, physical items, or services, you need to connect a payment gateway so funds go straight to your bank account.
- Click on your profile icon in the top right menu corner and select Settings.
- Scroll down the left sidebar and click on Payment Gateways.
- Choose your preferred provider, such as Stripe or PayPal.
- Click the connect button and follow the step-by-step instructions on the screen to link your payment account.
Setting Up Your Custom Domain Name
Systeme.io automatically provides a free web address for your pages, but using your own domain name (like www.yourbusiness.com) builds trust with buyers. You can easily link a custom domain bought from registrars like Namecheap or GoDaddy inside the Custom Domains tab in your settings menu.
Step 2: Create a New Sales Funnel
Now that your base settings are configured, you are ready to construct your funnel structure.
Click on the Funnels menu option at the top of your dashboard screen. Then, click the green Create button in the upper right corner.
A setting box will appear on your screen asking for basic information:
- Name: Give your funnel a distinct title so you can keep track of it easily.
- Funnel Goal: Select the primary outcome you want to achieve.
- Currency: Choose the currency you plan to bill your customers in.
Systeme.io offers four main path options:
- Build an audience: Best for creating simple lead capture funnels to grow your email list.
- Sell a product: Designed to showcase a product, manage checkout payments, and handle upsells.
- Custom: A completely blank structure that lets you build custom page flows from scratch.
- Run an evergreen webinar: Used for setting up automated video training presentations.
Select “Sell a product” if you plan to accept payments immediately, or “Build an audience” if your immediate goal is capturing email leads. Click Save to create your new workspace.
Send, Spend & Hold Money Worldwide Without Hidden Fees
Transfer money internationally at the real exchange rate and hold 40+ currencies in one account.
Open a Wise AccountMid-market rate • Fast transfers • 40+ currencies
Step 3: Design Your Lead Magnet Squeeze Page
After creating the funnel, you will see a list of funnel steps stacked on the left side of your screen.
Click on the Squeeze Page step in the left panel. A collection of professionally designed templates will display on your screen. Look for a clean template that matches the vibe of your topic or offer, then click Select.
Once the template loads, click the Edit Page button represented by the magic wand icon. This launches the drag-and-drop page builder.
Principles of a Clear Squeeze Page
Keep your opt-in page simple and direct. Pages with too many text blocks, extra links, or confusing images distract visitors and lower opt-in rates. Focus on these core elements:
- A Strong Main Headline: Clearly state the biggest benefit of your free offer. Focus on the main result your reader wants.
- Supporting Bullet Points: List three short points that explain what readers will discover inside your free download.
- An Easy Opt-in Form: Ask only for necessary details, like a first name and primary email address.
- A High-Visibility Button: Use a bold color for your submit button and clear text like “Get My Free Guide Now.”
Editing content inside the builder is as simple as clicking on any text box and typing directly on the page. You can drag new elements like text, images, or spacing blocks from the left sidebar right onto your canvas. When finished, click Save Changes in the top right corner.
Step 4: Build Your Sales Page and Order Form
If you choose to direct subscribers straight to a paid product after they opt in, you need a high-converting sales page and checkout order page.
Click Add Step in your left funnel menu, name the step “Sales Page,” and pick Sales Page as the page type. Choose a template and open it inside the page builder.
Writing an Effective Sales Page
You do not need fancy marketing language to sell effectively online. Simply talk to your customer like a real person and clearly explain how your offer solves a specific problem.
Organize your sales page structure using these sections:
- Attention-Grabbing Headline: Highlight the core problem your product solves and who it is built for.
- The Problem and Solution: Explain why standard methods fail and how your offer provides a faster or easier path.
- Product Breakdown: List everything included in your product, such as modules, worksheets, or bonus materials.
- Social Proof: Add real customer feedback, quotes, or success stories to establish credibility.
- Clear Call to Action: Place buy buttons throughout the page so readers can jump directly to the checkout form when they are ready.
Setting Up the Order Form and Checkout Page
Next, select the Order Form step in your left menu. This is where your customer fills in their billing details.
The $0 Secret To Launching Your Entire Online Empire
Why pay hundreds every month for separate software? Build funnels, send emails, and make sales with Systeme.io completely free.
Get Started For $0Free Forever • No Credit Card Needed • Beginner-Friendly
Under the main settings on the left sidebar, scroll down to the “Digital Product” or “Physical Product” selection. Choose your product type and attach the price plan you want to use.
To boost your revenue, you can add an Order Bump to this page. An order bump is a small additional offer presented as a single checkbox right on the checkout page, such as a $10 companion workbook or audio file.
Step 5: Automate Email Delivery and Workflows
A great sales funnel relies heavily on automated backend actions. When a visitor fills out your form or buys your product, your platform must process that action instantly.
Creating Tags to Stay Organized
Systeme.io uses tags to organize your contacts instead of separating them into individual email lists.
- Go to Contacts in the main top header menu and select Tags.
- Click Add a new tag and name it something clear, such as “Lead – Free Guide” or “Customer – Paid Course.”
Setting Up Automation Rules
Go back to your Funnel view, select your Squeeze Page, and click on the Automation Rules tab at the top of the dashboard.
- Click Add rule and select the trigger “Funnel step form subscribed.”
- Click Add action and select “Add tag.” Select your new lead tag.
- Click Add action again and select “Send email.”
Click the plus icon to write the welcome email that will deliver your freebie automatically. Include a clear download link inside the email body text so subscribers can access their file immediately.
Creating an Automated Email Campaign
To keep building relationships with your new subscribers, set up an automated email campaign:
- Click Emails in the main navigation menu and select Campaigns.
- Click Create to start a multi-day email sequence.
- Write helpful messages that provide extra tips, share stories, and direct readers back to your paid sales page over time.
If you produce online content or manage online media channels to drive traffic to your business, understanding automation strategy is essential. Check out our detailed guide on YouTube automation strategy to learn how creators build automated traffic pipelines that feed their funnels continuously.
Step 6: Test Your Sales Funnel Thoroughly Before Launching
Before sharing your new funnel with the world, perform a complete test run to ensure every single page, button, link, and automated email works correctly.
Follow these simple testing steps:
- Copy your live Squeeze Page URL.
- Open a new private or incognito browser window and paste the link into the address bar.
- Submit a test email address through your opt-in form.
- Verify that you are redirected to the correct next page in your funnel sequence.
- Check your email inbox to verify that the welcome email arrives quickly and that all download links work.
- Switch your payment settings to test mode in your dashboard to perform a test purchase on your order page. Ensure the checkout process works without any glitches.
Testing every step in advance prevents technical issues and guarantees a smooth experience for real customers.
How to Drive Qualified Traffic to Your New Funnel
A fully functional sales funnel will not generate results on its own without visitors. Once your system is built and tested, your primary job shifts to driving targeted traffic to your squeeze page link.
Content Marketing and Blogging
Publish informative, practical articles on your website or blog that address common questions in your niche. At the end of each post, offer your free lead magnet as a helpful next step for readers who want deeper guidance.
Organic Social Media Marketing
Share daily tips, short videos, and insights on your active social media pages. Put your squeeze page link in your social media bios and invite followers to grab your free resource.
You can connect with our community and see how we share insights across our social channels on Facebook, Instagram, and X (formerly Twitter).
Search and Video Platforms
Platforms like YouTube and Pinterest act as search engines where people actively search for solutions to their problems. Creating simple tutorial videos or helpful graphics that link directly to your opt-in page brings in highly interested visitors for months or even years.
Frequently Asked Questions (FAQs)
Is Systeme.io completely free to use?
Yes, Systeme.io offers a free-forever plan that requires no credit card details. It includes up to 2,000 email contacts, 3 complete sales funnels, unlimited email sends, and 1 custom domain connection, making it ideal for new business owners.
Can I connect my custom domain on the free plan?
Yes, you can connect a custom domain name (such as yourdomain.com) even on the free plan. Systeme.io gives you simple CNAME records that you paste into your domain registrar dashboard to point your domain to your funnel pages.
Do I need coding skills to build pages in Systeme.io?
No coding skills are required. The visual page editor uses a clean drag-and-drop system. You can move text, buttons, images, and form elements around your page simply by clicking and dragging them with your mouse.
How do I collect payments from buyers?
Systeme.io connects directly with Stripe and PayPal. When a customer pays on your checkout page, the funds are processed securely through your connected Stripe or PayPal account and transferred straight to your personal or business bank account.
What is the main difference between an order bump and an upsell?
An order bump is a small add-on offer displayed directly on the checkout form before the purchase is completed. An upsell is a secondary, standalone offer shown on a separate page right after the main payment goes through, allowing buyers to add an extra item with a single click.
Wrapping It Up
Building a sales funnel does not have to be complicated, confusing, or expensive. With an all-in-one platform like Systeme.io, you can create your pages, build your automated email workflows, and collect payments from one unified system.
Focus on building a simple funnel first: a clean squeeze page, a helpful lead magnet, a direct sales page, and a friendly welcome email sequence. Test every step thoroughly, fix any minor issues, and then focus your energy on sending targeted traffic to your offer.
Want to learn more about our online platform and our mission? Visit our About Us page to get the full story. If you have questions or want to reach out to our team directly, head over to our Contact Us page and drop us a message.
